This site uses affiliates. Thank you for buying through our links and supporting this blog.


Squarespace to WordPress site migration guide – Why and how to make the switch

Are you thinking of moving your site from Squarespace to WordPress? Then look no further! This is the ultimate, most in depth, step by step guide to making the move from Squarespace to WordPress!
There are many reasons why someone would choose to build a site on Squarespace over WordPress – the beautiful design, the all in one solution, the super easy to use interface. And there are just as many reasons, or more, why someone would choose to migrate from Squarespace to WordPress – the price, the functionality, the add ons, site speed.
It is important that you get clear on why you want to switch over and make sure this really is the right step for you.
Oh, and if you’re just starting a new blog, I have this article for you too!
Why did I choose to move from Squarespace to WordPress?
I decided to move from Squarespace to WordPress because I kept bumping into more and more frustrating issues with Squarespace and couldn’t take it any longer.
Moving to WordPress allowed me to further customize my site and optimize things I had no access to in Squarespace, all while saving quite a bit of money. I’d say that’s a win!
After building many sites in Squarespace (it was my job after all!) I recently made the decision to move Craving Adventure and all my other sites over to WordPress. This was not an easy decision! I’ve been building sites in Squarespace for years and while this is no longer my main source of income, it was still a big shift and had big repercussions on my business model.
I love how easy and streamlined everything is with Squarespace, but it does come at a premium price, the site speed is poor (Google has been pushing for fast sites more and more) and there are limits on customization. Can you believe there’s no auto-save and no way to revert back your posts?! You can lose the whole thing if you haven’t saved a change and your wi-fi cuts out or your laptop battery dies!
After the Core Web Vitals update, my traffic dropped and when I decided to add e-products and a shop to Craving Adventure it became clear that Squarespace is no longer the place for me. I wasn’t going to pay even more for an already pricey service just to be able to add a shop.
I did some quick math and I was able to move three of my sites from Squarespace to WordPress, add a shop and branded emails, purchased some premium themes and plugins all for just a fraction of what I would have paid in Squarespace!
While I was busy building sites in Squarespace, WordPress made a massive leap forward and is now a lot more user friendly than 5 years ago when I first started building sites and fell in love with Squarespace. I used to hate WordPress due to its cumbersome backend but with the introduction of Gutenberg and especially with the latest update, WordPress has made a massive improvement in its interface and ease of use. So much so that I now prefer it to Squarespace!
I’m not yet done optimizing all my articles nor images but there is already a massive improvement in speed and my traffic is up to pre-CWV update levels and then some. I will let you in on some more concrete stats once I munch my way through all the posts and give Google enough time to index and make sense of the new site.

Should you switch from Squarespace to WordPress?
If you have a content-heavy site with a content and SEO strategy in place, depend heavily on organic traffic or need a lot of customization, then you should consider switching from Squarespace to WordPress.
If you are a small business that values convenience above all, you mostly use your site as a place to refer your existing leads to, or don’t have the resources to invest into a proper content strategy and SEO, then you’re good where you are.
While moving from Squarespace to WordPress was certainly the right choice for me, this does not necessarily mean it is also the right choice for you. If your Squarespace site is currently giving you everything you need, then there’s no need to move to WordPress and your resources are probably better used elsewhere.
This is where the majority of my previous clients fall. They’re happy with their site just the way it is and there is no reason for them to move. Understanding this I have no intention to upsell them to migration to WordPress. Sure, it would be a nice cash injection, but their business would not benefit from it and I’m just not that kind of girl.
If you’re thinking of migrating from Squarespace to WordPress as a means to save money, I’d recommend you do the math first, especially if you’d need to hire someone to help you with the migration. And if you do need someone to help you with the migration, feel free to get in touch with me and I’m happy to offer you a quote.
Starting a new site?
If you don’t have a site yet and are undecided between Squarespace and WordPress I would almost always suggest WordPress. And that’s coming from someone who used to hate WordPress and worshiped Squarespace!
Over the last few years Squarespace didn’t improve much while WordPress advanced immensely. Sure Squarespace is still a bit easier for someone who is just starting out but the tradeoff (lack in customization and functionality, slow loading speed, high price) is no longer worth it, especially considering that WordPress is no longer that complicated and cumbersome as it used to be.
Squarespace SEO vs WordPress SEO
It’s easy to blame your lack of organic traffic on the platform you’re using, but in reality, it all comes down to good keyword research and helpful content. If you don’t have these in place, then neither Squarespace nor WordPress will make the difference in your rankings.
If you don’t do your keyword research properly and you don’t put your keywords in all the right places you just won’t rank. And honestly, if that’s the case Squarespace might be the better choice since they really push you to use those keywords in the right places and if nothing else, Squarespace is much easier to use when you don’t know what you’re doing.
If on the other hand, you are knowledgeable about SEO then you will have a little bit more wiggle room on WordPress and your CWV might finally get out of the red!

Squarespace to WordPress migration
If I oversimplify it, moving a website from Squarespace to WordPress is as easy as:
- Set up your site on WordPress,
- Export your content from Squarespace and import it into WordPress,
- Clean up your site, set up any apps you need and go live,
- Transfer your domain and cancel Squarespace.
That sounds simple, right? Wrong! I’m not gonna lie, moving from WordPress to Squarespace can get messy. And the mess gets bigger the bigger your site is.
Being a designer and having a lot of experience building sites (even if only in Squarespace) certainly gave me an edge and made the transition easier. I also made sure to choose a hosting provider and a theme with great support which made a big difference in making this transition as smooth as possible. Sure, there were some bumps in the road but overall it wasn’t as scary or hard as I initially thought it would be.
That being said, switching from Squarespace to WordPress comes with a steep learning curve. You are moving away from an all in one service with easy drag end drop editing and are left with countless choices of hosts, themes, plugins, add ons, designs… Not all of them play well together and they often like to point fingers at each other when something goes wrong. It’s a wild world!
If you’re not tech savvy I would recommend you get someone to help with the initial setup as it will save you many headaches and speed up the process considerably.
How to migrate from Squarespace to WordPress – step by step
Let me start with a very important piece of advice – do not cancel your Squarespace subscription until your WordPress site is live, the DNS servers are done propagating and you’ve had a chance to test your new site and see what it does to your traffic and rankings. Make sure everything is just the way it should be before you cancel Squarespace!
Alright, now let’s move on to the actual migration, step by step!
1. Pick and purchase your hosting
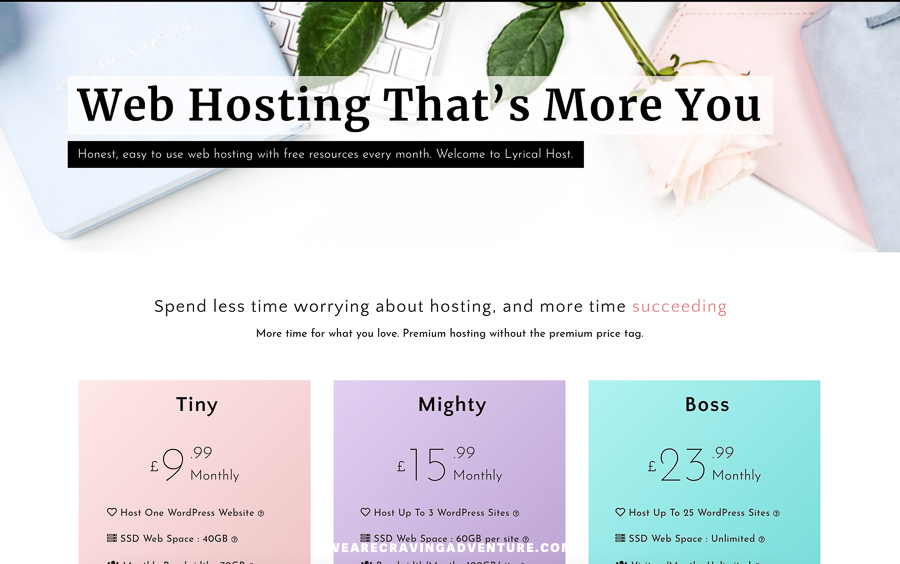
I use (and love) Lyrical Host. Their customer service is the best I’ve ever encountered, I still can’t believe how incredibly helpful their support team is. Those guys work around the clock and are extremely responsive, kind, helpful and absolute legends!
Lyrical Host also takes care of domain registry, WordPress tech setup, site backups, SSL, they have a built-in CDN and caching service, they also offer free courses and stock photos to their customers, plant trees on your anniversary and so much more!
You honestly can’t go wrong with Lyrical and I would almost go as far as claiming that they are the Squarespace of WordPress if that makes sense, and they are your best cheerleader!
Use code CRAVINGADVENTURE for a 10% discount on your first purchase with Lyrical Host
I would also urge you to stay away from BlueHost, GoDaddy, Namecheap and similar low price and low-quality hosts. They often have hidden costs for all sorts of ‘extras’ that you actually really need (like an SSL certificate). They also tend to be much slower than premium hosting, more exposed to safety breaches and their support is subpar, to say the least.
2. Pick and install your theme
In terms of themes, I’d recommend you stick to the well known and popular ones since these will have the best support, stay up to date and fix any possible issues before you even notice them.
I use Blocksy on this site which is fantastic and in my opinion the most similar to Squarespace. I also use Neve on another site and might like it even better. Astra, Generatepress and Kadence are also popular choices. The free versions of these themes are great, but if you’re serious about blogging I’d recommend getting the pro version as it offers more functionalities and great support.
Some of the main things you should be looking at when picking a theme are support and good coding. A lot of the really pretty overdesigned themes tend to be rather slow and heavy with limited functionality.
With Gutenberg advancing quickly and offering more and more flexibility, there is no need to use a site builder (like Divi or Elementor) and unnecessarily slow down your site. I would even go as far as to speculate that WordPress is going in a direction where themes are becoming less and less important. Gutenberg is offering more site customizations and is only a matter of time before it will cover full site design, a bit like Squarespace.
Blocksy or Neve are my top picks and I highly recommend them. Once you make a decision about the theme you want to use, let Lyrical support know and they can install it for you.
Both themes have a ton of demo sites you can choose from if you need some help with the initial site design. However, since you will be importing your content from Squarespace into WordPress you might find it easier to do the design manually.

3. Install & set up your plugins
Coming from Squarespace, plugins are a new concept. A plugin is a piece of software that offers additional functionality or features that can be added to your WordPress site. And there are countless options to choose from!
Most hosting providers and themes will come with a list of recommended (or even mandatory) plugins as well as a list of conflicting ones.
However, those lists are by no means extensive and you’ll have to look at how your plugins interact with each other too. Ideally, you’ll have only one piece of software (plugin, theme or hosting) doing one thing, without overlap and none of them conflicting with each other.
This can be tricky and when you’re just getting used to WordPress it’s easy to take everyone’s advice and end up with 30 plus random plugins, all interfering with each other. So don’t get too carried away, take some time to understand what each bit of software does or doesn’t do and make sure you really need that functionality before you add it to your site.
I mean, do you really need to display an interactive map of all the places you’ve been to? Or would you rather have a safer, faster, more responsive site with the potential to rank better?
Don’t get carried away with too many plugins, make conscious decisions when installing them and make sure to set them up properly. That being said there are some plugins that you will most probably want to install.
My plugin recommendations:
- If you opted for Lyrical hosting there is no need for additional CDN, SSL, backup or caching plugins.
- With Blocksy you won’t need a plugin for lazy loading or connecting your Google Analytics.
- If you opt for the Blocksy theme make sure to install the Blocksy Companion and Getwid to get access to more Gutenberg blocks and layout templates.
- If you allow user comments or reviews on your site you will need a plugin to filter through all the spam. I use Antispam Bee but Aksimet is a popular choice too.
- If speed is a concern you will need to minify the code and Autoptimize is the recommended plugin by Lyrical Hosting.
- ShortPixel will help you optimize your images and can also serve them in webp format (smaller and much faster). Obviously no plug in is a viable replacement for uploading properly sized images and if speed is a concern that’s where I’d start.
- Plugins to help you connect any other services you might need, like WooCommerce and Stripe if you have an online store or your Email Marketing service.
- I use Rank Math as my SEO plugin of choice but it’s important to understand that having an SEO plugin won’t make you rank by itself. Even having ‘all greens’ in this plugin won’t necessarily make you rank. There is so much more you need to understand before you can effectively use these plugins!
- WPCode which let’s me inject code snippets like the GA tag and enable my affiliamate tracking (highly recommended, it’s a game changer if you use affiliate links!), as well as perform some advanced coding.
4. Choose your URL format
Before you start creating any pages or posts in WordPress you should quickly set up the permalink structure. Ideally, you’d be able to keep this the same as on your Squarespace site to avoid unnecessary redirects.
By default, all your new blog posts in WordPress will have a date in the URL which I’d suggest you remove and opt for /blog/post-slug or blog/category/post-slug instead, depending on your current URL structure in Squarespace.
To change the permalink structure go to your Dashboard > Settings > Permalinks and make the necessary adjustments.
One thing to keep in mind is that if you ever manually imported a special slug with a slash in Squarespace, like /blog/manual-import/post-slug that will not be supported in WordPress and it will turn into /blog/manual-import-post-slug. In these cases, you will need to set up a 301 redirect.
5. Export your Squarespace site
Squarespace made it easy to export (most of) your content and you can do this by going to Settings > Advanced > Import/Export. Here select Export and then WordPress. This will start exporting all your content which can take a few minutes. Once it’s done download the export and move onto the next step.
If you had more than one blog or a blog and a portfolio set up in Squarespace you’ll have to export them separately. However, if that is the case, keep in mind that WordPress only supports one blog by default and you will need a separate plugin or a clever workaround.
There are also things you won’t be able to export from Squarespace, like your template and style changes. But also video and audio, as well as index pages, products, event pages and some other features. If you want to transfer these over you’ll have to do it manually.

6. Import your content into WordPress
Armed with your little Squarespace export (a .xml file) return to your WordPress site. Go to Dashboard > Tools > Import and install the WordPress Tool. Once the instal is finished you’ll be able to click Run Importer and upload the .xml file you downloaded from Squarespace.
In the next step, you can either assign all articles to an existing author or create a new one for this purpose. If you want to assign articles to different users you’ll have to change that manually after the import.
To make sure your content has been imported go to Dashboard > Pages where you should be able to see all your pages (index pages will be broken down into several pages) and Dashboard > Posts where you should be able to see all your articles.
While the import works great for importing text, its features are lacking when it comes to design. It will keep paragraph and heading styles as well as text links and quotes but other blocks will be more affected;
- You won’t be able to import video or audio.
- All images will be transferred over but will still be served from the Squarespace servers (you can check that by right clicking and inspecting the image).
- You won’t be able to preserve your columns.
- Markdown blocks will usually be transferred over as text and you might end up with paragraphs of code if you were using any affiliate widgets or 3rd party email forms.
- Any image designs, galleries or summary blocks will be imported as single image with a caption underneath.
- Any link settings like no follow or open in new tab might not work.
- While I found that the buttons were transferred over properly on my static pages they were converted to a text link when used in blog posts.
We’ll be addressing these issues over the next few steps. For now, you can go ahead and delete the Import plugin.
7. Customize your theme
Now that you have some content on the page is time to do some basic design tweaks. Create menus, design your header and your footer, define your typography, your colours, hover effects, transitions and more. Don’t worry about the actual positioning of the content or minor tweaks, at this stage I’d keep things simple and just get the site a little bit more on-brand.
To customize your theme go to your Dashboard > Appearance > Customize then work your way through your theme options and make your desired changes.
Ideally, you’ll have a brand board you can refer to, otherwise, take this as an opportunity to create one. Trust me, it will come in handy!
8. Design your static pages
Now that you have the core design tweaks in place it’s time to tackle your static pages. I like to start with the homepage but you might have other pages take priority. If you had index pages in Squarespace you will have to merge the many pages created during the import into one.
Rearrange the content in a way that makes sense, play around with the Gutenberg blocks and feel free to go back to theme customizations to get the look you want.
Since it’s easy to spend days or even weeks on minuscule design tweaks it’s important that you get clear on your goals and priorities before you slide down this rabbit hole. Do you want the site to be absolutely perfect or do you want it to be decent and live as soon as possible?
When it comes to Craving Adventure time was of the essence. I wanted to get this site live on WordPress as soon as possible so I opted for the MVP (minimum viable product) approach. I got the site to a stage where it looked OK-ish, was easy to navigate and displayed the information in a clear manner. I will eventually revisit it in more detail but for now, it will do as it is.
9. Clean up your blog posts
Depending on how long and how actively you’ve been blogging, your blog post count could easily be in the hundreds. And if you used any blocks other than text and single images in one column, cleaning up these articles will be a little bit of a mission.
Importing articles from Squarespace into WordPress puts the whole article into a classic text editor so the first thing you’ll want to do is to convert this into Gutenberg blocks. This will give you more flexibility, more features and that Squarespace feel.
Next, you’ll want to re-do any columns, remove any remains of summary blocks and replace these with post carousels, remove any leftover code from affiliate widgets or sign up forms and reinsert these, re-do all buttons as well as re-do any anchors and jump links, or even better, just use the Table of Contents block.
This step might be pretty easy if you only have a handful of blogs or if their content and design are fairly simple, but if you have a big blog with loads of interactive and design features this step can be very time-consuming.
I suggest you take the move as an opportunity to do a little audit so you can better prioritize your efforts. This could also be a good opportunity to purge some articles that get no traffic or the ones you wrote 5 years ago when your blog had a completely different direction.
I’d also take this chance to have a look at your Categories and Tags. Chances are they’re all over the place and it’s a good idea to clean them up every now and again.
10. Do the last tweaks
This step will be very different for each one of you depending on your specific site;
- If you had an online store on Squarespace you will need to import those products manually.
- You can use Contact Form 7 if you need a contact form with more functionality than the one built into WordPress.
- If you are displaying the author under your blog posts now is the time to set up their profile pages properly.
- If you have social buttons make sure your accounts are connected properly.
- If you had any event, album or gallery pages you’ll need to set these up manually as well.
11. Sort out your images
And now to the fun part! Remember how I said that although your photos do show up in the content they’re all still served from the Squarespace servers? Now it’s time to sort that out so you don’t end up image-free once you cancel your Squarespace subscription.
There are two ways you can go about this step and both come with some pretty strong cons. I know this isn’t something you want to hear, trust me, I don’t like it either!
Option 1 – Import your photos manually
Pros: It gives you a chance to properly resize & optimize your phots and you will be able to keep a neat and clean media library.
Cons: Time consuming.
Best if: You have a somewhat manageable amount of phots, you still have access to those photos, you never resized or optimized your phots (you really don’t want to carry this mess over!)
How to:
If you chose to import your photos manually you’ll want to do this as you work your way through your pages and posts layouts to minimize back and forth.
Option 2 – Use the Auto Upload Images plugin.
Pros: It’s fast and automated.
Cons: It creates duplicates if the photo is used more than once, it sometimes assign weird file names, you might lose some metadata, your media library will be a mess.
Best if: your images are already properly sized and you rarely (or never) reuse the same image. Or if you have so many photos that you’d rather end up with a super messy media library than spend days importing photos manually.
How to:
If you chose the plugin way you’ll want to install the Auto Upload Images plugin. Go to Dashboard > Posts and select all posts (use Screen Options in the top right to change the number of posts displayed per page). Then select Edit in the Bulk Actions drop-down and click Apply. Don’t change any of the settings, just click Update. This will import all the photos into your blog posts. Now you need to repeat this for your pages.
Once you’re done you can make sure the photos have been imported and relinked by inspecting the image on your site (you might need to clear the cache first). When this is done, feel free to delete the Auto Upload Images plugin.
Now, depending on the number of your images, you might get a little heart attack when you look at your media library. You could try cleaning it up with the paid version of Media Deduper. It has some pretty decent reviews online but for me, it did not work. I’d certainly do a backup before you fire it up. What I ended up doing is compressing every picture with ShortPixel. Sure, it did use more credits than necessary but it saved me hours of work!
12. Set up redirects
If you had to change your permalink structure, removed any articles, made any changes to your categories or tags, or if you previously had index pages that you have now merged together, you will need to set up redirects for the links that no longer exist.
If you’re with Lyrical Host this is as easy as sending through a list of old and new urls and they’ll get this sorted for you.
I would also recommend keeping an eye out for any 404 error pages on your site. You can do this by turning the 404 monitor on in Rank Math. This way you’ll quickly find out if there are any other URLs that need to be redirected.
I would also recommend you go through your content and update your internal links to direct to the new URL rather than going through a redirect.
13. Set up Google Analytics and Search Console
You’ll want to set up Google Analytics and Search Console before your site goes live. This way you’ll be able to track your stats throughout the whole migration period when the two sites coexist.
I have mine set up through Rank Math which works great for me as it gives me more insight into the data from within my WordPress Dashboard. You can also enter your Google Analytics ID number into the Blocksy theme or get the Lyrical support team to enter it into the header for you.
Just make sure you only connect your Google Analytics and your site once or you will get all the wrong stats! If your traffic suddenly doubled and your bounce rate dropped to almost nothing, that is usually a sign that you have more than one GA tag active.
14. Go live
Have a last poke around your site and if everything looks good it’s time to go live! If you’re with Lyrical Host that’s as easy as sending them a message and they’ll take care of everything else, including your email if you’d like to transfer that too.
The DNS servers need up to 48 hours to propagate worldwide (and in my case, it took every last second of those 48 hours!). During this time people in different locations will be seeing either your Squarespace site or your WordPress site, depending on the server. It’s important you don’t cancel your Squarespace subscription before this period is over.
15. Transfer your domain
You can transfer your domain over from Squarespace at any time since your Squarespace account and Domain are two independent services. Or you could choose to keep it with Squarespace if you felt like paying extra for it.
Transferring a domain is also separate to the DNS servers and you can do it during the 48 hour period.
When you transfer the domain from one registrar to another you will be charged a transfer fee. This fee also covers the domain registration for the next year. However, it resets the renewal date.
If your domain just renewed you might choose to keep it with Squarespace till closer to its renewal date to avoid paying for it twice. Or if your domain is about to renew and you already know you want to switch to WordPress, you can transfer your domain over before your site is ready.
16. Make sure everything works and cancel Squarespace
Once the 48 hour propagation period is over have a last look at your site and make sure you’re happy with everything. If so, it’s time to cancel your Squarespace subscription.
If you were on the yearly plan and more than 2 weeks have passed from your renewal date, Squarespace won’t issue a refund. Luckily there is a workaround to get your money back and I share it with my clients.
It’s also important to understand that your site will still be available on the built in Squarespace domain until your subscription expires. It’s important you hide this content from search engines or your site might get in trouble for plagiarized content.
Welcome to WordPress!
What a ride, huh? Migrating your site from one platform to another is quite a task and like it or not, you are practically building a new site. There are bound to be some complications and you do need to learn new skills to navigate the new environment.
I hope this guide helped you decide whether migration from Squarespace to WordPress is the right choice for you and execute this move in a (somewhat) seamless manner.
If at any point you get stuck or if you’d like to outsource this task, feel free to get in touch and I’d be happy to discuss this further.
Read next:
Blogging
How to pitch to hotels for collaboration
E-book
Photography
Travel drone photography guide for beginners
Travel lifestyle

Thanks so much for this! I used it exclusively when migrating my site. It took about a month to rebuild everything but because of your instructions it wasn’t so painful. Today my site is finally live on WordPress. Woohoo!
So glad this guide helped and you’ve migrated successfully 🙂
I am using ShortPixel per your recommendation, but in recent WebPageTests of my site, it’s calling out ShortPixel Adaptive Images as the culprit for my page speed issues. I have the plugin specifically to help with speed (and for next gen formats) so that seems kind of backwards, but I guess offloading images to their server takes up time. Do you think getting rid of this plugin would be a mistake? I do already resize images before upload, but even so, I remember back in the day when I was still on Squarespace my images were a big cause of bad speed scores. Some I’m kind of scared to get rid of Shortpixel but I don’t know what else to do.
You might want to get in touch with ShorPixel support, maybe there are some settings you need to adjust.
Curious when you switched over from SS to wordpress? I’m considering making the switch too now as I’m tired of constantly failing the core web vitals and SS not caring to fix it for bloggers.
Hi Tylor, I made the switch at the end of summer and it really helped – it was such a great feeling to finally pass the core web vitals!
Hello,
As i have read your blog, its very helpful for website developers to gain some knowledge about WordPress migration services.